Different versions of Outlook might use slightly different terminology but the required information for each is the same.
- Make sure Outlook is not running on your computer, if it is – close Outlook.
- Navigate to your computer’s Control Panel: select Start then Control Panel.
- Select Mail from the list of settings.
- In the “Mail Setup – Outlook” window, select Data Files.
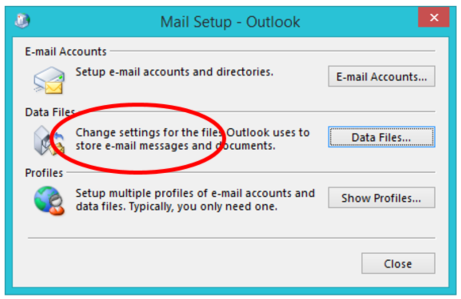
- In the “Account Settings” window, note the location and the name of the current PST file.
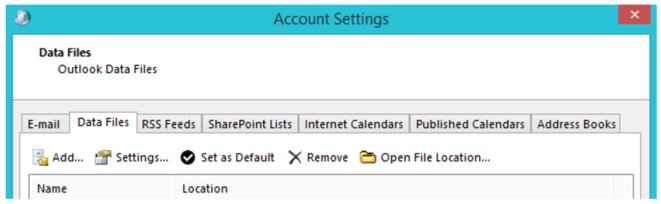
- Close the “Account Settings” window.
- In the “Mail Setup- Outlook” window, click Show Profiles.
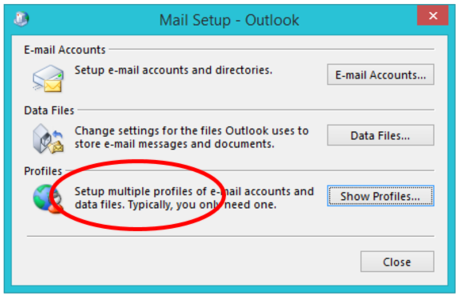
- In the “Mail” window, you will see the existing profiles that are on this computer. Click Add.
- In the “New Profile” window, name the new profile – we suggest Outlook (IMAP). Click OK.
- In the “Add Account” window, select Manual setup or additional server types, then click Next.
- Then select POP or IMAP then click Next.
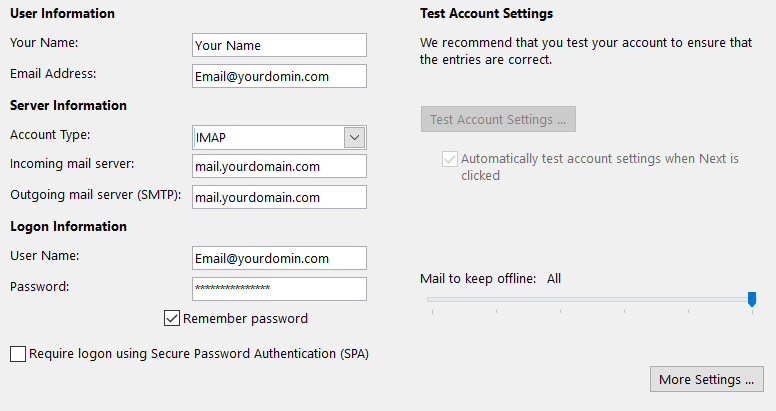
- Fill out the “Add Account” window accordingly, filling it in with your/your organizations’ information:
- In the example below for Your Name; Enter Your Real Name
- In the example below for Email@yourdomainname.com; Enter Your Real Email Address
- In the example below for mail.yourdomain.com; Replace yourdomainname.com with your real domain name.
- When the “Add Account” fields are completed, click More Settings.
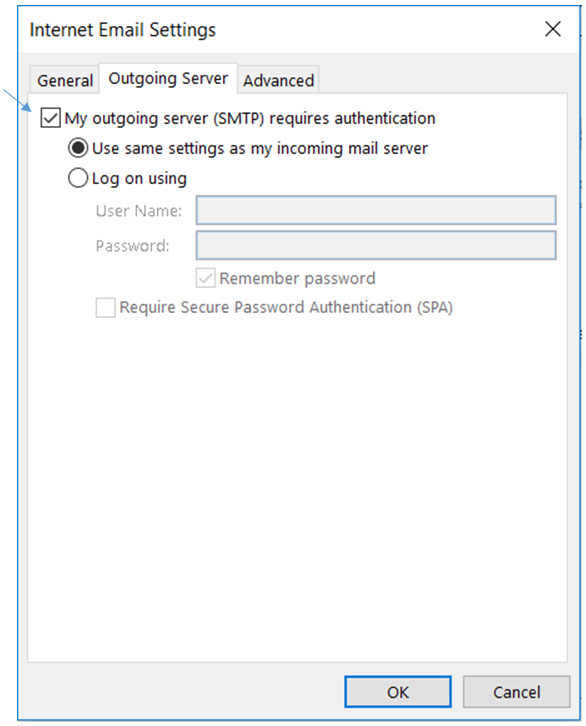
- Select the Outgoing Server tab.
- Select the option “My outgoing server (SMTP) requires authentication”, then select “Use same settings as my incoming server”. Then click OK.
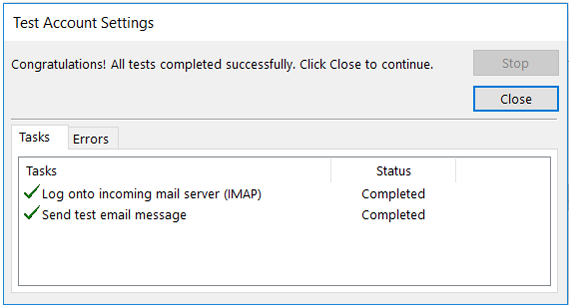
- In the “Add Account” window, click Next. The wait a few moments while tests are performed, if both tests are successfully completed – you are set.
- Click Close. If the either test fails, go back and check the settings you have entered so far.
- In the “Add Account” window, click Finish.
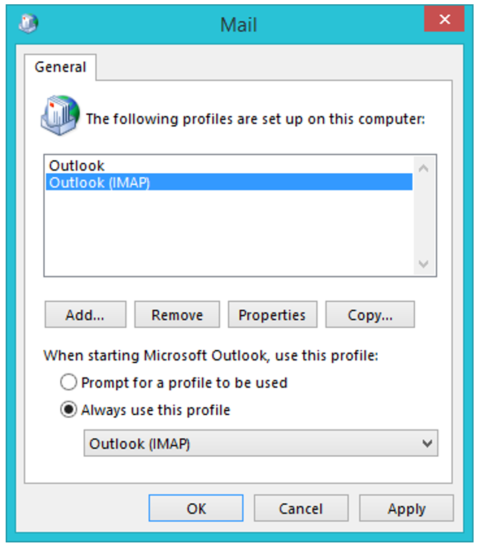
- In the “Mail” window – select Always use this profile, then select Outlook (IMAP) from this list. Click OK.
As you step through these processes, keep in mind that different versions of Outlook might use slightly different terminology but the required information for each is the same.
- Next Launch Outlook.
- Click File.
- Click Options.
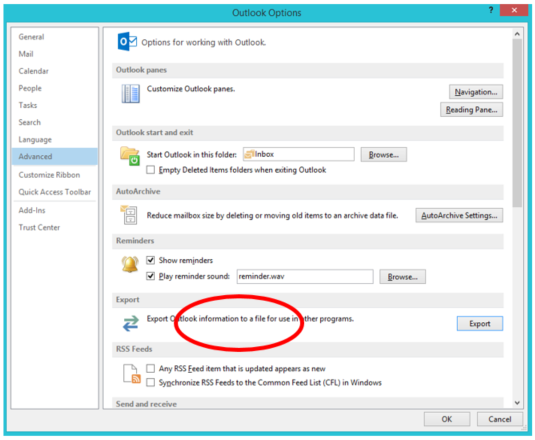
- Choose the Advanced tab.
- Click Export.

- Select Import from another program or file, then click Next.
- Select Outlook Data File (.pst). Click Next.
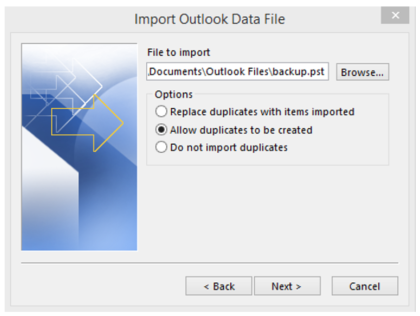
- Click the Browse button, locate the .pst file noted in step 5 (from “Transferring a Mail POP account to an IMAP” instructions) and click Open.
- Select Allow duplicates to be created, then click Next.
- Make sure the settings are selected as such below. Click Finish.
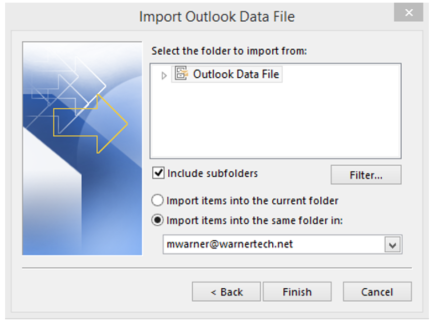
- The records from the imported PST file will be imported into the current Outlook folders and then synchronized to the email server. Depending on the number of records and size of the Outlook data file, this process may take several minutes to complete.
Please contact the INSYTE support team now if you have any questions or issues while peforming any operations outlined above.